
Introduction: The Mistake That Cost Me Three Episodes
I still remember the excitement of unboxing my first “professional” microphone. It arrived in a sleek box, looked impressive on my desk, and had hundreds of glowing reviews online.
Then I hit record.
My voice sounded hollow. Every car passing on my street was captured in perfect detail. My computer fan hummed loudly in the background. And the worst part? I had already recorded three full episodes before I realized how bad the audio actually was.
That experience taught me a painful lesson: choosing a podcast microphone is easy. Choosing the right one takes real knowledge.
After that disaster, I spent months testing different microphones, talking with audio engineers, and learning what actually makes a podcast sound professional. I tested over a dozen mics in every price range. I recorded in quiet rooms, noisy apartments, and everything in between.
This guide shares everything I learned. Whether you’re launching your first show or finally upgrading your setup, I’ll help you avoid the mistakes I made and find the microphone that fits your needs perfectly.
What Actually Matters in a Podcast Microphone
Before we talk about specific products, let’s understand what separates good podcast audio from bad.
The Three Things Your Microphone Must Do
| Requirement | Why It’s Essential |
|---|---|
| Block Background Noise | Your listeners shouldn’t hear your surroundings—only your voice |
| Deliver Clear Vocals | Your speech should sound warm, natural, and easy to understand |
| Work Consistently | You shouldn’t waste time fighting with settings before every recording |
Dynamic vs. Condenser: Which One Belongs on Your Desk?
This is the most common question new podcasters face. Here’s the straightforward answer.
Dynamic Microphones are what radio stations have used for decades. They’re designed to capture sound from close range while ignoring everything else. If your recording space isn’t a professional studio, a dynamic microphone will serve you well.
Condenser Microphones are more sensitive. They pick up subtle details but also capture room echo, keyboard clicks, and distant noise. These work beautifully in treated spaces but can be frustrating in home environments.
For most podcasters recording at home, a dynamic microphone is the smarter choice.
The Five Best Podcast Microphones of 2026
After extensive testing across different environments and setups, these five microphones earned their places on this list.
1. Shure MV7+: The All-in-One Solution
")
Price: $299
Best For: Podcasters who want professional sound without complexity
The Shure MV7+ feels like someone designed it specifically for home podcasters. It solves problems you didn’t even know you had.
What Makes It Special
The dual connectivity option is a game-changer. You can plug it in via USB today and start recording immediately. When you’re ready to expand your setup, switch to XLR without buying a new microphone. It grows with you.
The automatic leveling feature changed how I record. As you move naturally while speaking—leaning back, gesturing, getting animated—the microphone adjusts its sensitivity to keep your volume consistent. You never sound distant or suddenly too loud.
Background noise disappears before it reaches your recording. The built-in processing filters out computer hum, distant traffic, and room echo automatically.
The touch panel gives you visual feedback at a glance. You can see your levels and mute status without guessing.
Who Should Buy This
If you want one microphone that will serve you well for years, this is it. The MV7+ delivers professional results while keeping setup simple.
Who Should Skip
If your budget is under $200, there are more affordable options that still deliver good results.
2. Shure SM7B: The Industry Legend
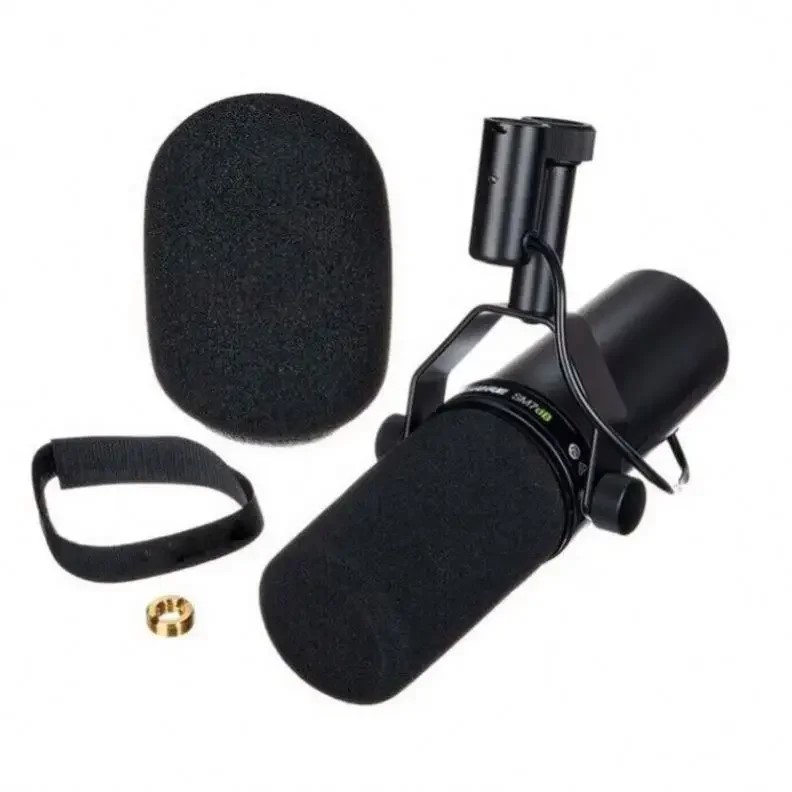
Price: $399
Best For: Serious podcasters with existing XLR equipment
This microphone has earned its reputation. It’s the sound behind countless successful podcasts, and for good reason.
What Makes It Special
The SM7B produces a warmth that flatters the human voice. Words sound rich and authoritative. There’s a reason radio stations have trusted this microphone for generations.
Background noise rejection is exceptional. This microphone focuses tightly on your voice and ignores everything around it. Even in less-than-perfect rooms, it delivers clean recordings.
Durability is built in. These units regularly last a decade or more with proper care.
The Important Catch
The SM7B needs significant amplification. Plugging it directly into a basic audio interface often results in weak, quiet recordings. You’ll need either an interface with powerful preamps or an external booster like a Cloudlifter.
Who Should Buy This
If you already own XLR equipment and want the gold standard of podcast microphones, the SM7B delivers.
Who Should Skip
Beginners without audio interfaces should look at USB or hybrid options first.
3. Shure SM7dB: Legendary Sound, Simplified
Price: $499
Best For: Podcasters wanting SM7B quality without extra gear
Shure listened to the feedback about the SM7B’s gain requirements and created a solution.
What Makes It Different
The SM7dB contains the same microphone capsule as the original—the sound is identical. What’s changed is the built-in preamp that adds clean gain without external boosters.
A simple switch lets you add either 18dB or 28dB of amplification. This means you can plug directly into any audio interface and achieve proper levels without purchasing additional equipment.
If you prefer using your own external gear, you can bypass the built-in preamp entirely. The flexibility is there when you need it.
Who Should Buy This
This is for podcasters who want the legendary SM7B sound without dealing with Cloudlifters and extra cables.
Who Should Skip
The price puts this out of reach for beginners. Consider the MV7+ or Samson Q9U if you’re just starting.
4. Samson Q9U: The Value Champion
Price: $149
Best For: Beginners who want quality without breaking the bank
The Samson Q9U convinced me that you don’t need to spend hundreds of dollars to sound professional.
What Makes It Special
Dual connectivity at this price point is rare. Use USB for simple setup today, and switch to XLR when you’re ready to expand your setup.
Physical controls give you hands-on adjustment. A dedicated gain knob, mute button, and headphone volume control put everything at your fingertips.
Zero-latency monitoring means you hear yourself in real time without distracting delay. This helps you deliver natural, engaging performances.
The build quality feels substantial. Metal construction gives you confidence that this microphone will hold up over time.
My Testing Experience
I recorded multiple episodes with the Q9U and compared them against microphones costing twice as much. Properly positioned, the difference was surprisingly small. Most listeners would never notice.
Who Should Buy This
If you’re starting your podcasting journey and want professional sound without a premium price, this is your microphone.
Who Should Skip
Those seeking absolute top-tier sound quality may want to invest more.
5. Rode PodMic USB: Built for Remote Recording
Price: $209
Best For: Podcasters who frequently interview guests in different locations
Rode took their popular broadcast microphone and added modern connectivity features.
What Makes It Special
The sound profile comes from years of radio industry refinement. Voices sound clear, present, and professional.
Dual connectivity gives you USB simplicity and XLR flexibility in one package.
Rode’s software ecosystem sets this apart. Their Connect application allows multiple USB microphones to work together on one computer—perfect for recording conversations with remote guests.
The all-metal housing feels built to last. This isn’t a plastic microphone that will feel cheap after a few months.
Who Should Buy This
If you regularly record with guests in different locations, the PodMic USB combined with Rode’s software is a powerful solution.
Who Should Skip
Solo podcasters on tight budgets will find better value in the Samson Q9U.
USB vs. XLR: Making the Right Choice
This decision shapes your entire podcasting setup.
USB Microphones
Best For: Solo podcasters, beginners, minimal setups
Advantages:
- Plug directly into your computer
- No additional equipment needed
- Lower upfront cost
- Simple operation
Limitations:
- Using multiple USB mics together is complicated
- Less room for expansion
- Fewer professional controls
XLR Microphones
Best For: Multi-host shows, serious setups, maximum control
Advantages:
- Professional sound quality
- Easily expand to multiple microphones
- Industry standard connections
- Full control over your sound
Requirements:
- Audio interface ($100-$250)
- Additional cables
- More setup time
My Recommendation
Start with a hybrid microphone that offers both USB and XLR connections. The Shure MV7+ and Samson Q9U both fit this category. Use USB while you’re learning. When you outgrow it, you already own the right microphone for XLR expansion.
Completing Your Setup: Essential Accessories
A great microphone needs proper support to sound its best.
Microphone Arm ($30-$100)
A quality arm positions your microphone consistently and reduces desk vibrations. The InnoGear Heavy Duty ($30) works well for beginners. The Rode PSA1+ ($100) is the industry standard worth the investment.
Closed-Back Headphones ($50-$110)
You must hear yourself while recording. You can stop sound from seeping into your microphone by using closed-back headphones. The Sony MDR-7506 ($110) are studio standards. The Audio-Technica ATH-M20x ($49) offer solid performance at a lower price.
Audio Interface ($150-$250)
If you choose XLR, you need an interface. The Focusrite Vocaster Two ($250) was designed specifically for podcasters. The Focusrite Scarlett 2i2 ($200) offers excellent preamps for both podcasting and music.
Pop Filter ($10-$20)
Hard “P” and “B” sounds create popping that distracts listeners. A simple pop filter eliminates this problem for minimal cost.
Setting Up for Success
Equipment matters, but how you use it matters more.
Position Your Microphone Correctly
Place the microphone four to six inches from your mouth. Angle it slightly to the side—aim for your mouth, not directly at it. Keep it at mouth level for consistent sound.
Set Your Levels Properly
Your voice should peak between -12dB and -6dB on your recording meter. Speak at your normal volume while adjusting gain. Never let the meter enter the red zone—distortion cannot be fixed later.
Improve Your Recording Space
You don’t need a professional studio, but reduce echo where you can. Record in carpeted rooms with soft furniture. Hang blankets on bare walls. Close curtains. Turn off fans and noisy electronics.
Test Before Recording
Record thirty seconds of yourself speaking naturally. Listen back with headphones. Check for background noise, popping sounds, room echo, and consistent volume. Fix issues before recording your actual episode.
Frequently Asked Questions
What microphone should a beginner buy?
The Samson Q9U offers the best combination of quality, simplicity, and value at $149.
Do I need an audio interface?
Only if you choose an XLR microphone. USB microphones connect directly to your computer.
Can I use a gaming headset for podcasting?
You can, but the quality difference is significant. A dedicated podcast microphone transforms your sound.
How much should I budget for my first setup?
Plan on $200-$300 for a complete beginner setup including microphone, arm, and headphones.
Final Thoughts
Looking back at that first expensive microphone I bought, I realize my mistake wasn’t spending money—it was spending without understanding what I actually needed.
Your audience doesn’t care about your equipment. They care about hearing you clearly and comfortably. A $150 microphone set up correctly will serve you better than a $500 microphone set up poorly.
Focus on positioning, levels, your recording space, and consistent technique. Master these fundamentals, and any microphone on this list will deliver professional results.
Choose the microphone that fits your budget and recording environment. Set it up properly. Start recording.
Your voice deserves to be heard.
Have questions about your specific setup? Leave a comment below—I respond to every message.
Pingback: Storing Camera: The Ultimate Guide to Safe, LongTerm Camera1